Connecting Camera and Microphone:
General:
- A pop-up will likely appear asking if Meet has permission to use camera and microphone; select “Allow”
- Once in the call, make sure the microphone and camera are not muted.
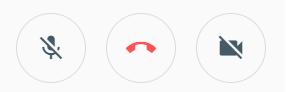
- Click on the logos on either side of the “end call” button
- If your microphone is muted, the background of the button with a microphone will be red. Others in the meeting will be unable to hear you if the background is red.
- If your camera is muted, the background of the button with a camera will be red. Others in the meeting will be unable to hear you if the background is red. (pictured below: settings as they should be)
Adjusting Settings:
If you are using an external camera and microphone, Meet may default to your computer’s camera and microphone. To change this:
- Click the “More Options” (three dots) button in the lower right-hand corner of the screen in the meeting.
- Select “Settings”.
- Navigate to the “Devices” tab.
- Under each category (Camera, Microphone, and Speakers), make sure the correct camera, microphone, and speaker is selected.
- You can also adjust the video quality under the “Quality” tab
- Lowering the quality will reduce lag
- Increasing quality will produce a better picture
Chat Feature:
Talking into the microphone is not the only way to speak with other member of your meeting; you can also use the chat function to type messages! To do so:
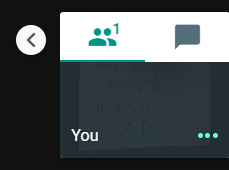
- Find the box in the upper right-hand corner. It has two tabs: one with people, and one with a textbox. Below these are a darkened preview of your own camera (pictured below)
- Click on the tab with the textbox image; it will now expand to reveal the word “Chat”
- Type your message at the bottom of the box, where it says “Send a message to everyone”
- Once you have sent it, other members of your meeting will receive a notification along with your message
Adding and Removing People:
Adding people after the meeting begins:
Adding directly from the meeting:
- Click on the “People” tab in the upper right hand corner above the self-view (indicated by the head-and-shoulders silhouette)
- Select “Add people”
- Enter the intended guests’ email address(es) into the box labeled “Enter name or email”
- They will receive a link to join the meeting.
- If desired, you can also dial a phone number under the “Call” tab
Adding through email:
- In the lower left-hand corner of the screen, select “Meeting Details”
- Select “Copy Joining Info”
- Paste the joining information into an email in a new tab and send it to the intended guest
- They will be able to join the meeting through this email
Removing people from the meeting:
- Select the “People” tab on the right-hand side of the screen
- Find the name of the individual you wish to remove from the meeting
- Click on the down-facing arrow next to their name; this will reveal three buttons (pictured below)
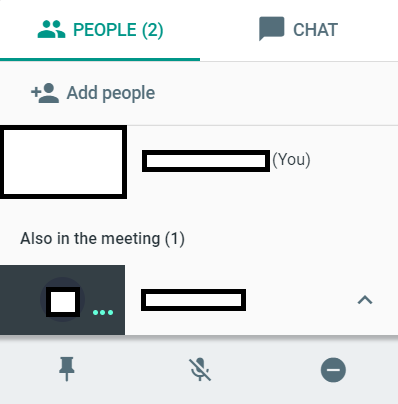
- Click the third button (a circle with the line in the middle) to remove the person from the meeting
Presenting from Your PC [The Live Class]:
While in a meeting, you may wish to present something like a presentation from Google Slides or some other form of media to students in your meet (Live Classroom).
- Pick how you’d like to present
- If you’d like to replace your camera feed with your presentation, click the “Present Now” button
- To present content while maintaining your camera feed, open a new tab present
- On the screen, a menu with possible meetings should appear. Join the intended meeting by clicking on it or by typing the meeting code in where it says “Present using a meeting code”.
- Note: If you do not see this menu, try opening an incognito window, and signing into your iper.ac.in account
- Select what you would like to present:
- Click “Your Entire Screen” tab to share your entire screen
- If your computer has a single monitor (e.g. a laptop with no external screen), you will only have one choice here
- If your computer has two monitors (e.g. a dual-monitor setup), you can choose which screen you want to share
- Under the “Application Window” tab, you can select which application/program you want to share and keep the rest of your screen private
- Click “Your Entire Screen” tab to share your entire screen
- If someone else shares content, your computer will automatically stop sharing its content.
Moderating:
Who shows up in the larger image:
There should be one large image with several smaller images to the right of the screen. Google Hangouts: Meet automatically switches which meeting member is larger based on who is speaking. To change this, click on an image on the right. This “pins” that individual as the primary image.
Muting others:
Everyone in the meeting has the power to mute others. Note that only individuals can unmute themselves, so each person will have to unmute themself after you have muted them. To do so:
- Navigate to the “People” tab
- Find the name of the individual you wish to mute
- Click the downward facing arrow next to their name; three buttons should appear
- Select the middle button (a crossed-out microphone) to mute them
Disconnecting from the Meeting:
To disconnect, simply hit the “leave call” (red telephone) button at the bottom of the screen.